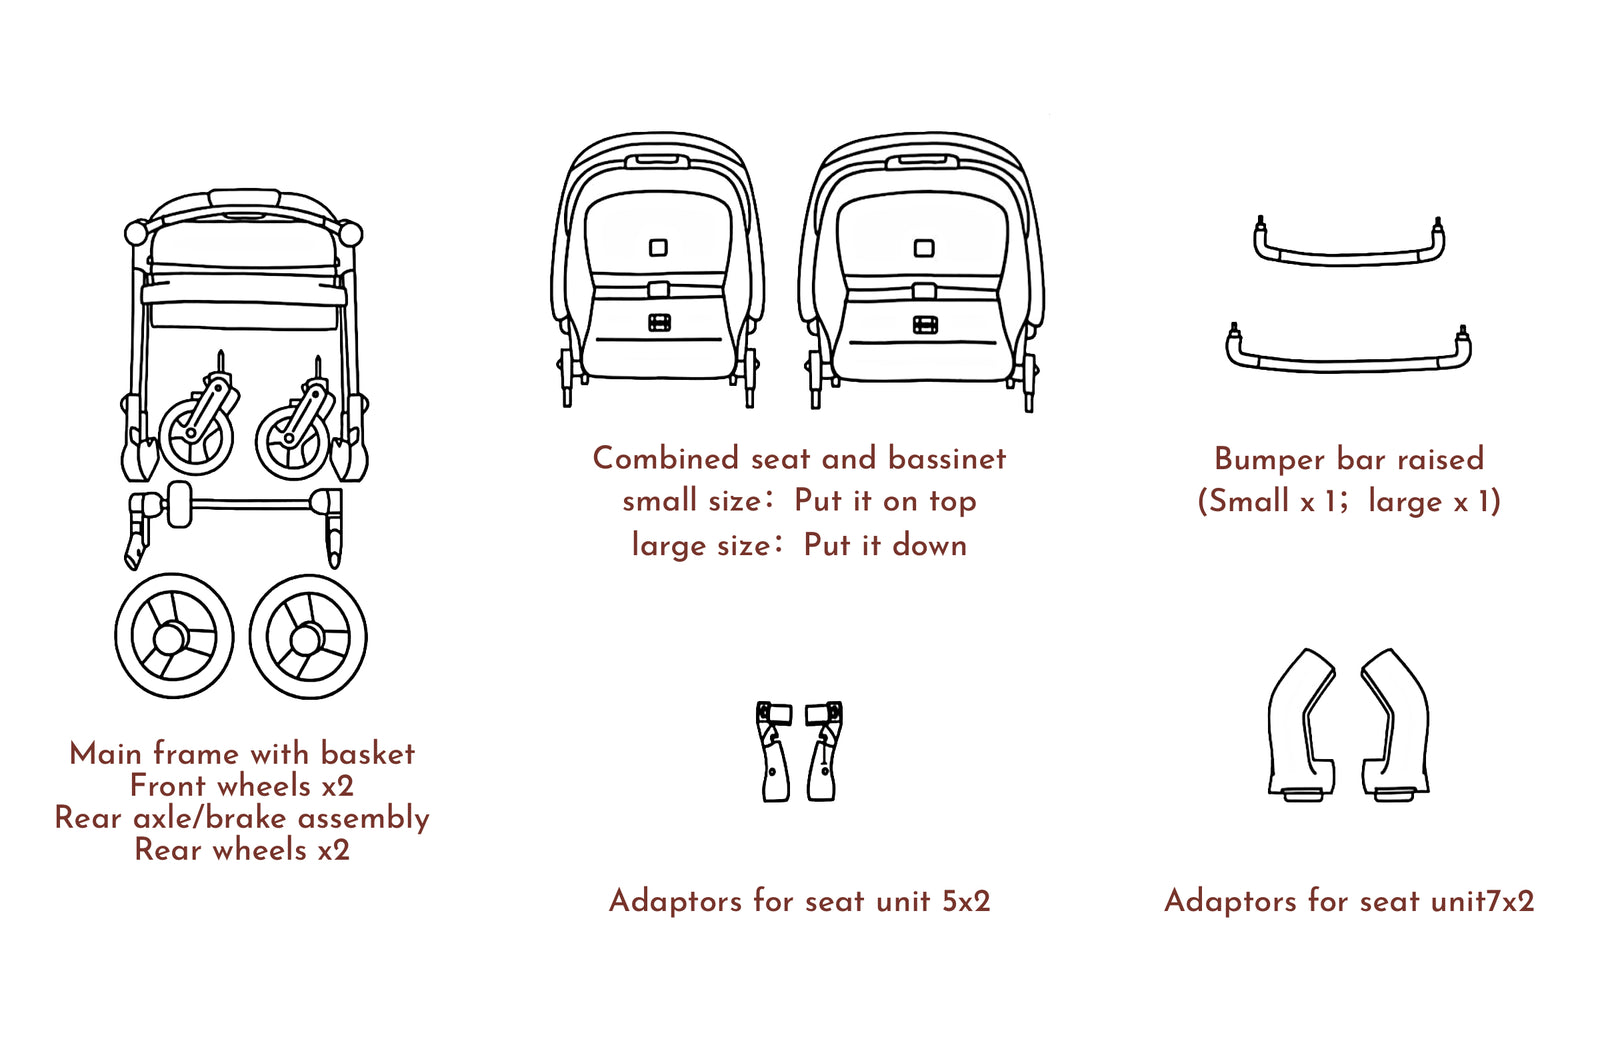
CHECKLIST OF PORTABLE TANDEM STROLLER
Thoroughly review the legend on the left. We will use the legend in further steps of this instruction.
Note:Some of the parts have already been assembled, and there are no missing pieces.
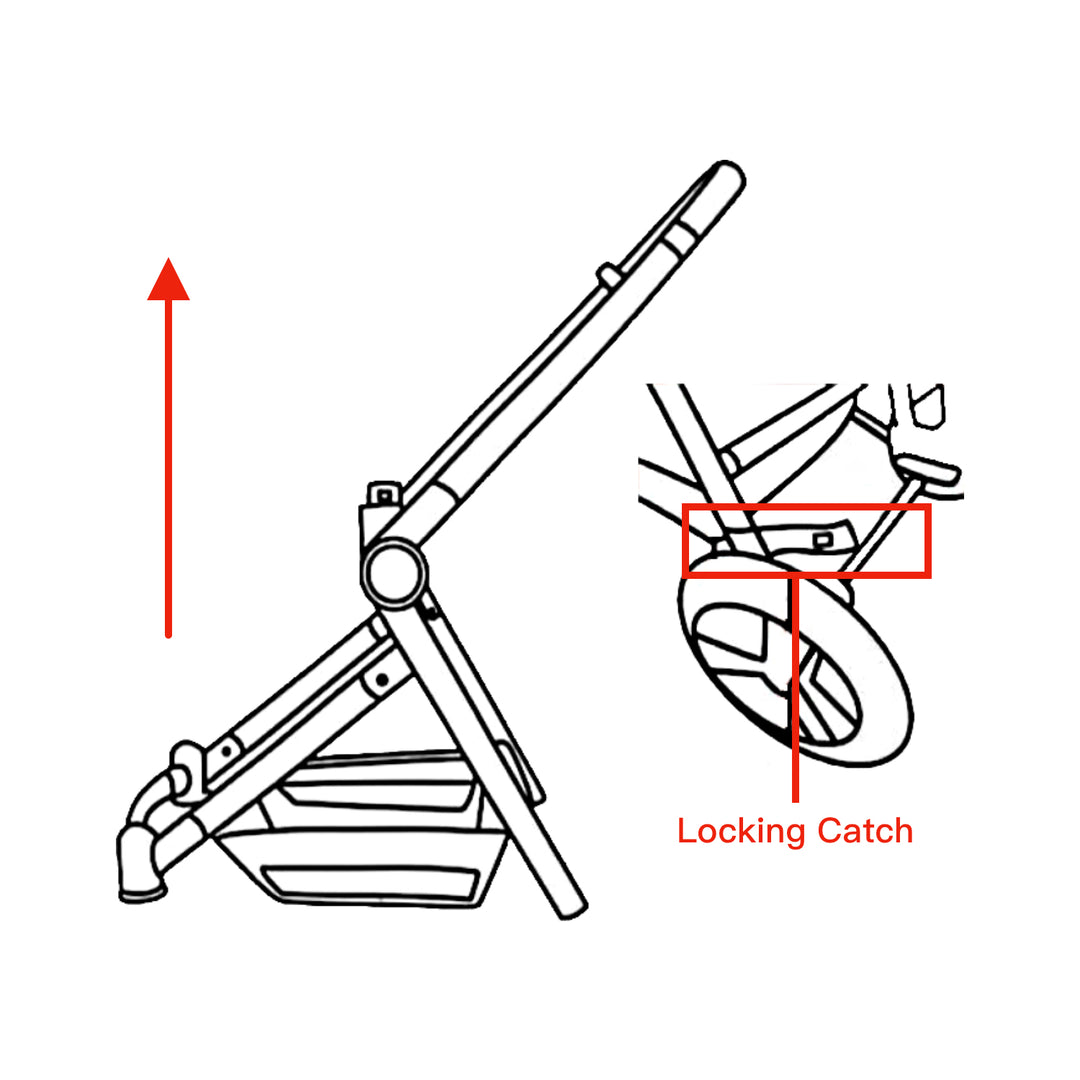
Step 1
Opening the Frame
To open the frame, release the locking catch and lift the handle upwards until it locks into place.
Warning: Make sure all locking devices are engaged before use.
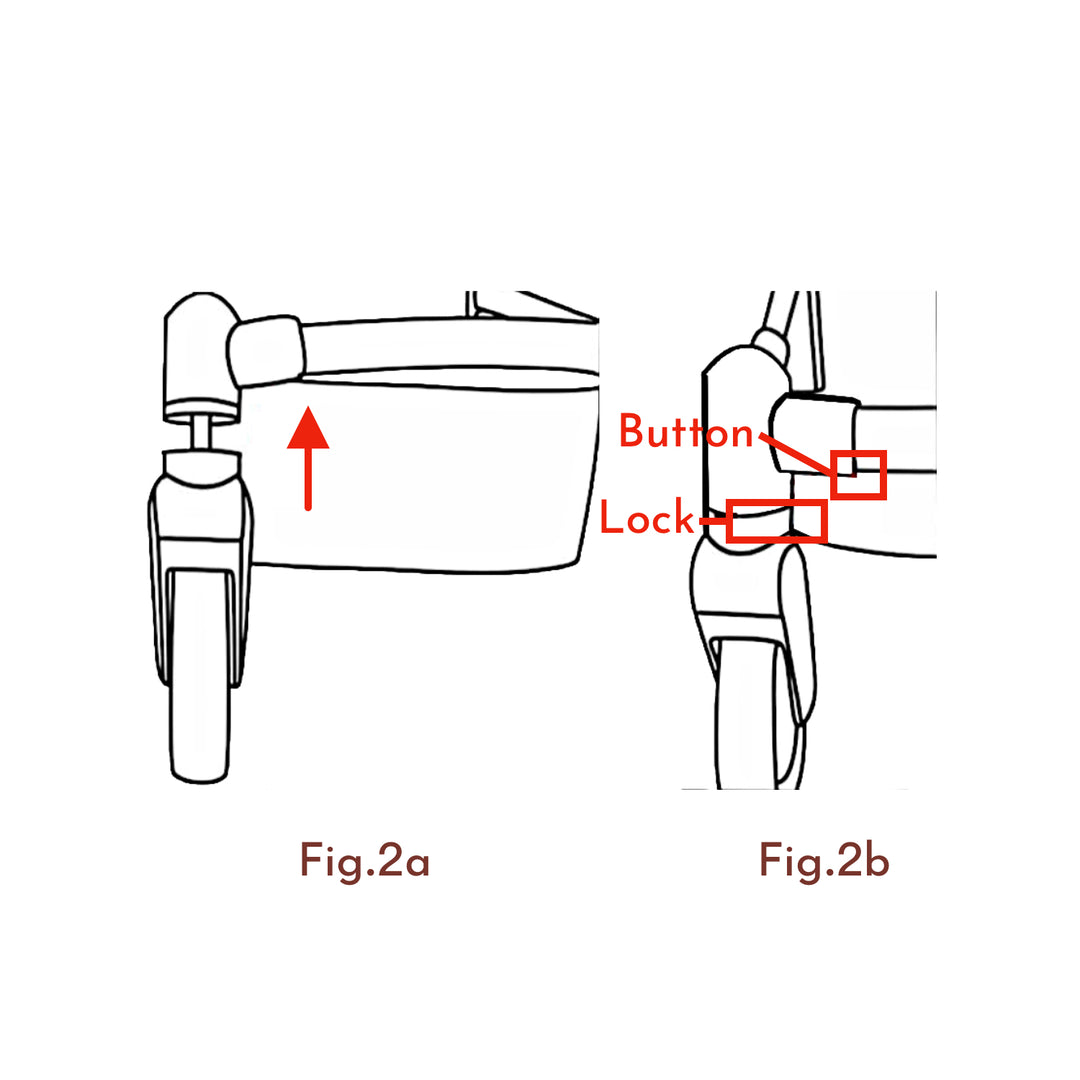
Step 2
Assembling the Front Wheels
Insert the metal stem of the front wheels into the wheel holders and push upwards until it clicks into place. (Fig. 2a)
To choose between a fixed or swivel wheel, slide the lock to the side. To remove the wheel, press the button and pull the wheel down. (Fig. 2b)
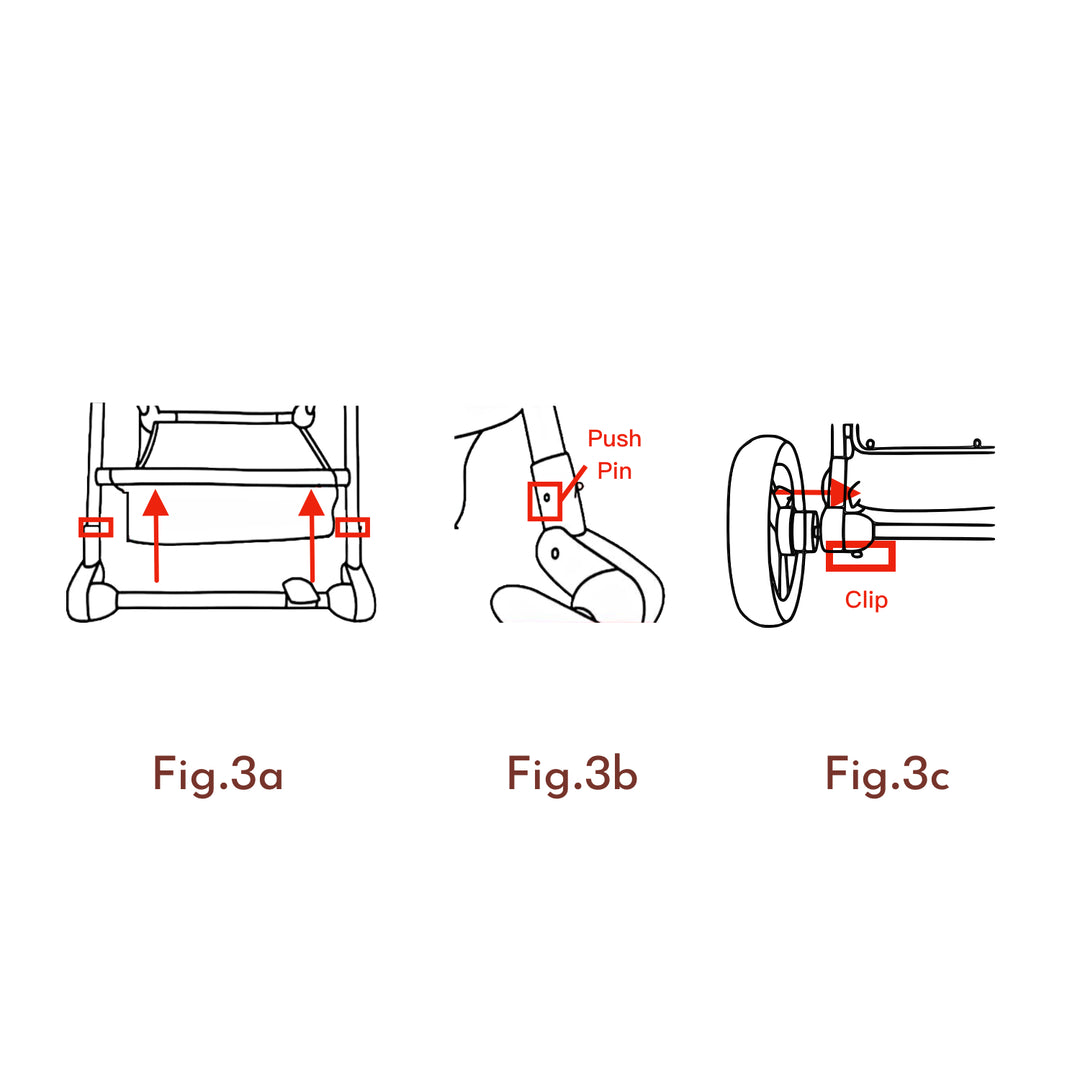
Step 3
Assembling the Rear Wheels/Brake Unit
Attach the rear axle/brake unit to the rear legs. (Fig. 3a)
Ensure the silver push pins are visible through the hole. (Fig. 3b)
Insert the stems of the rear wheels into the axle unit until they click into place. To detach the wheel, pull down on the clip and remove the wheel. (Fig. 3c)
Step 4
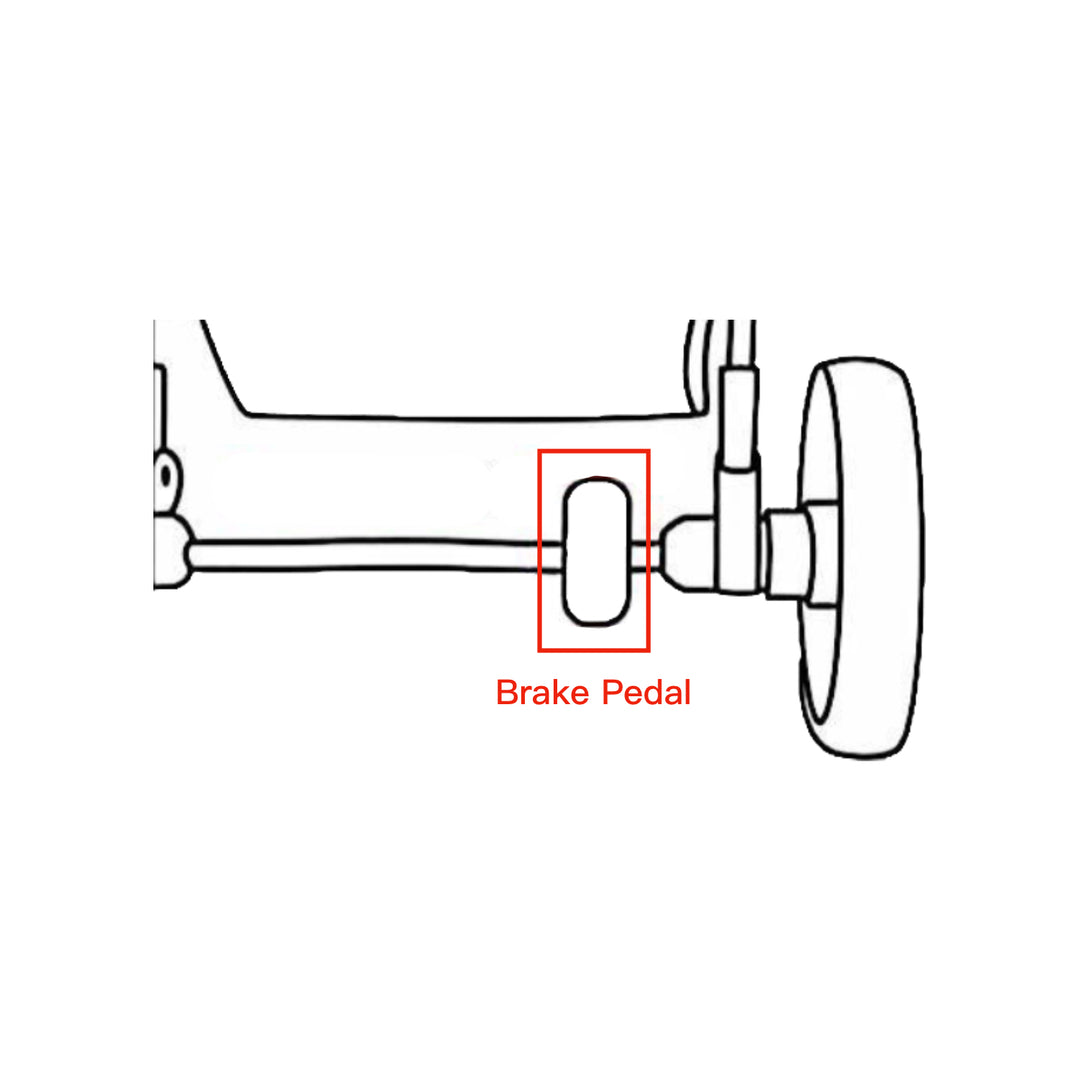
Operating the Brakes
To use the brakes, step on the back of the brake pedal to engage, and push forward on the front of the pedal to release them.
WARNING: Always engage all the brakes when parking the stroller.
Step 5
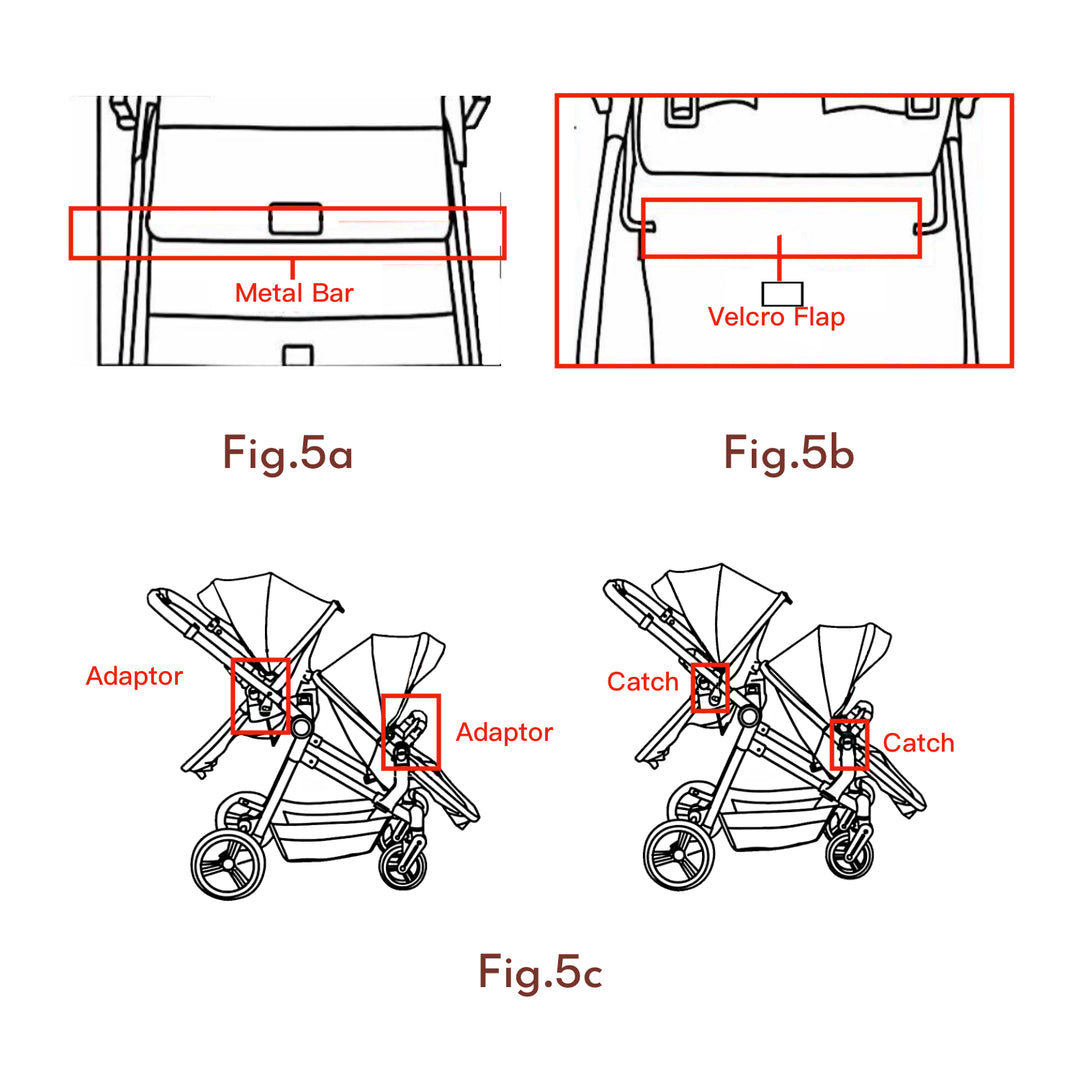
Attaching the Seat Unit
Before attaching the seat unit to the main frame, ensure the metal bar is positioned underneath the Velcro flap. (Fig. 5a)
Connect the adaptors, numbered 9 and 10, to the main frame and lock the adaptors marked 9. (Fig. 5b)
Insert the seat unit adaptors into the brackets on each side of the frame, then press down.
Open the seat frame until it is flat and locked in place. To remove the seat unit, pull up on the catches located on both sides of the adaptors and lift upwards. (Fig. 5c)
Step 6
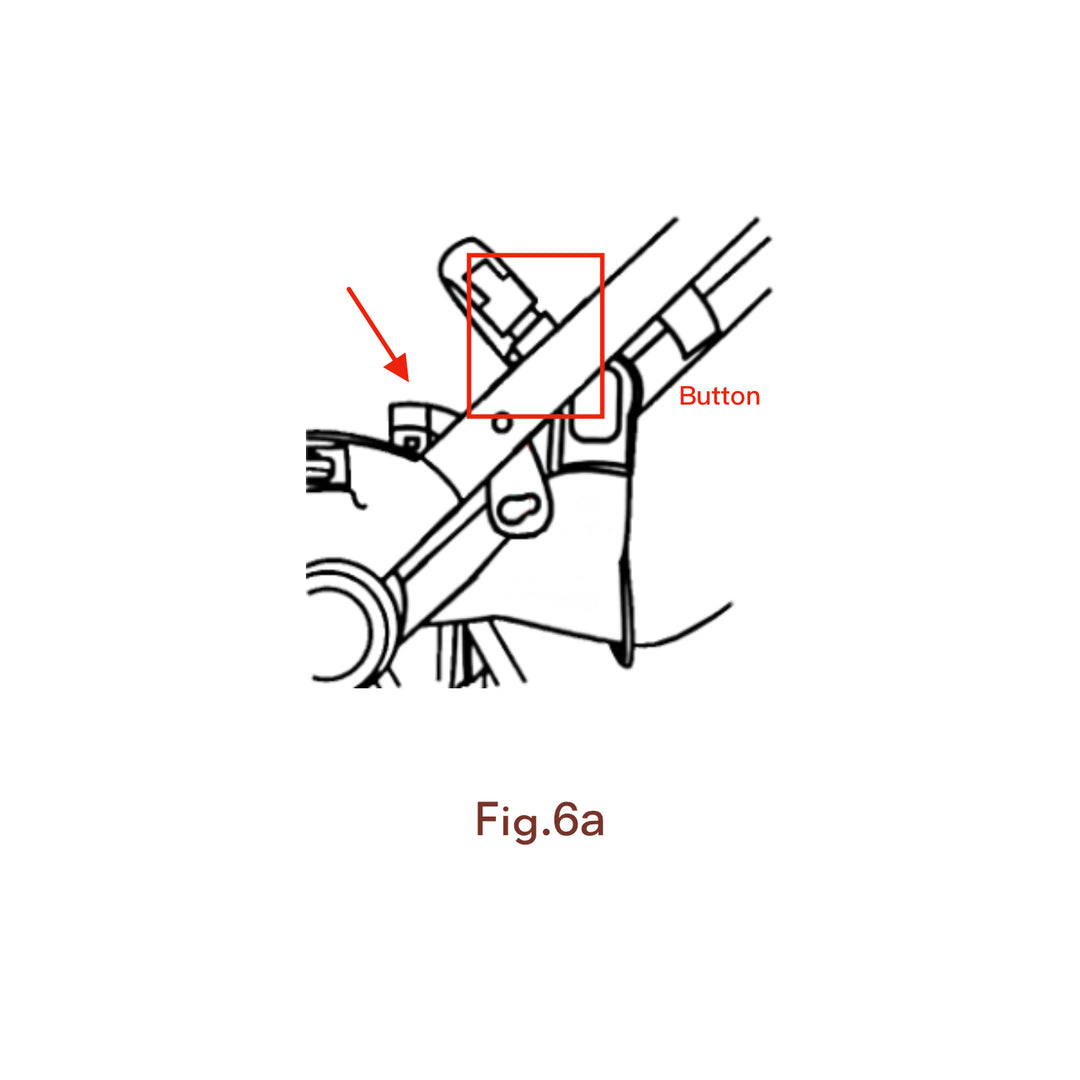
Attaching or Removing the Bumper Bar
Insert the ends of the bumper bar into the holes on top of the seat adaptors and press down until it clicks securely. To detach the bumper bar, press the button and lift up. (Fig. 6a)
Step 7
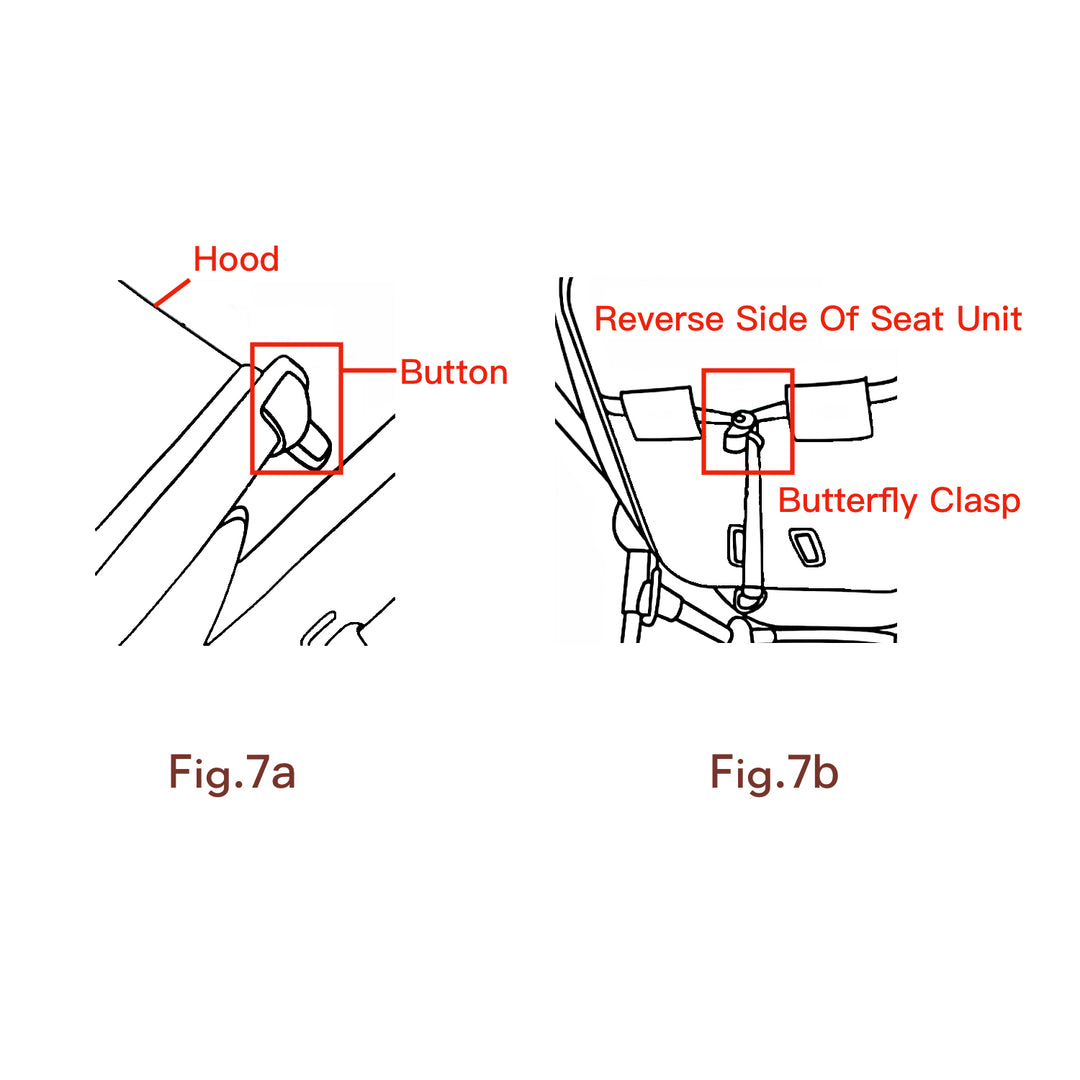
Adjusting the Seat Unit
To change the angle of the seat frame, press the button on the back of the seat (just behind the canopy). (Fig. 7a)
To lower just the backrest, squeeze the butterfly clasp on the back of the seat and pull down to the desired position.
To raise the backrest, hold the end of the strap, squeeze the clasp, and push it forward. (Fig. 7b)
Step 8
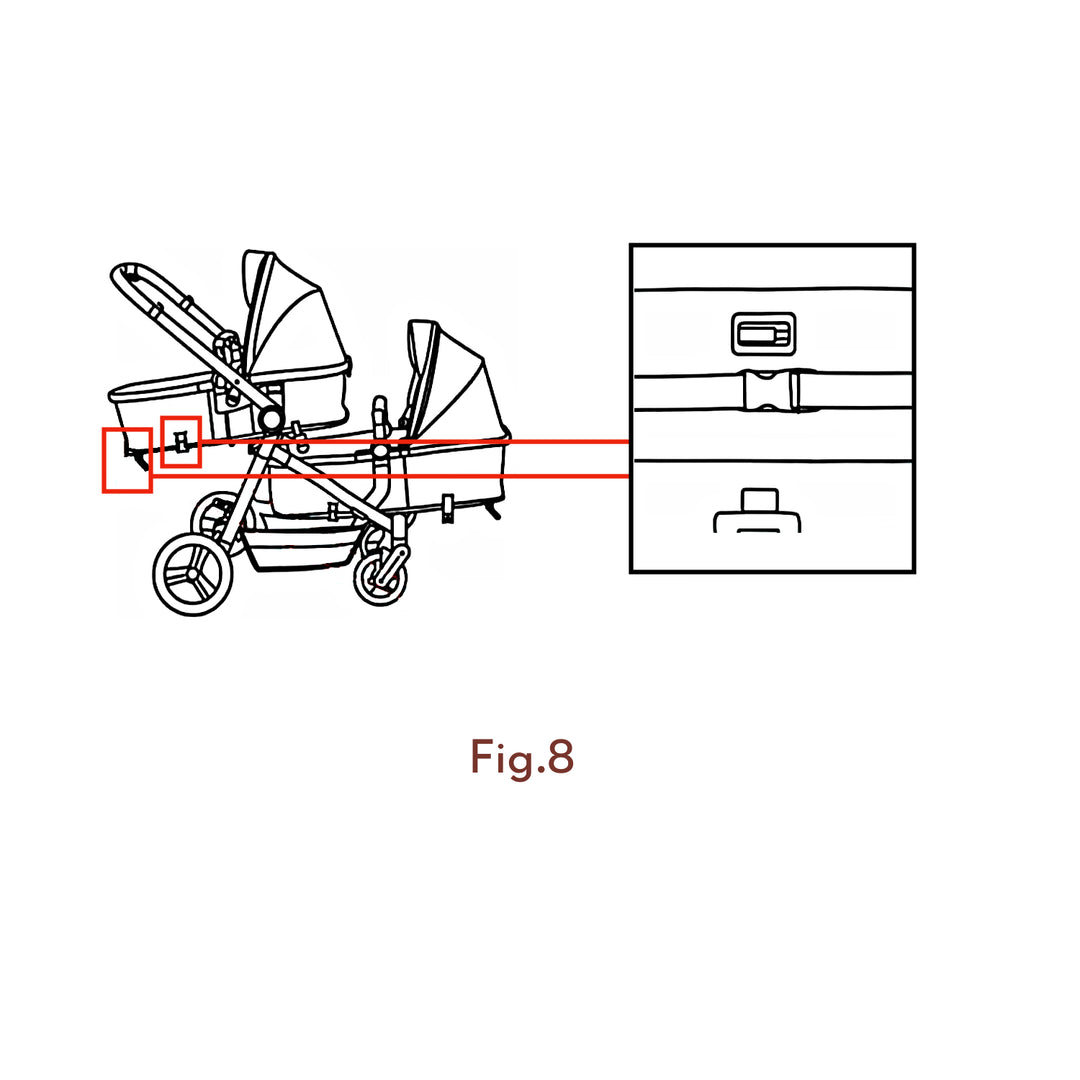
Carry Cot Mode
For carry cot mode, make sure the seat unit/carry cot frame is reclined to a flat position. Ensure the two buckles on the lower half of the seat are not fastened. (Fig. 8)
NOTE: It's recommended to remove the harness when using carry cot mode for a newborn.Find the ends of the harness buckles, turn them sideways, and pass them through the slots in the seat unit.
Step 9
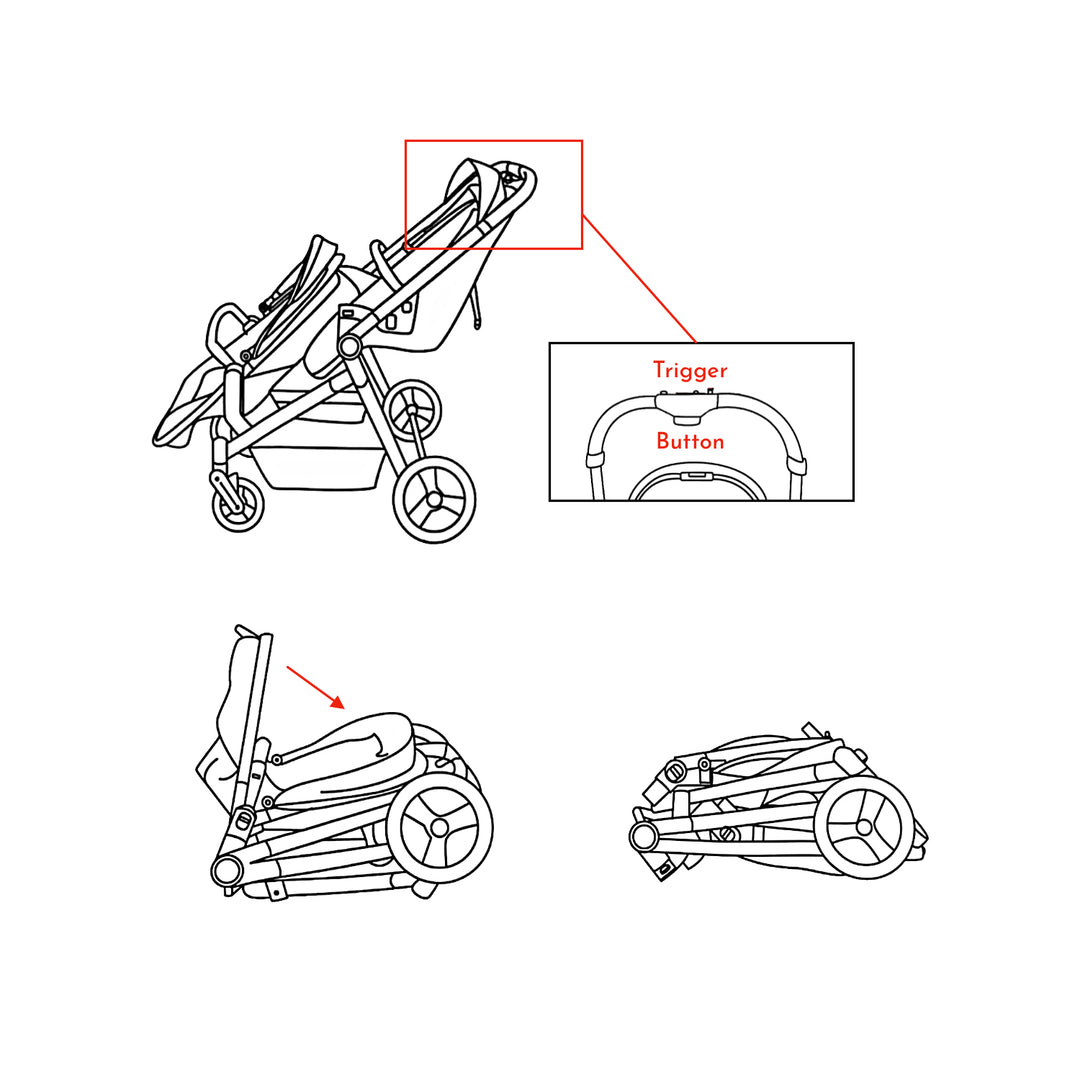
Folding The Stroller
1. Make sure the front wheels are set to swivel mode. Adjust the seat angle so the frame is parallel with the main stroller handle.
2. Pull the stroller back a bit so the front wheels face backward.
3. Slide the button to the side and squeeze the trigger to lower the handle toward the floor. The locking catch will engage automatically.
4. Press the button located on the frame at the bottom of the seat and swivel the lower half toward the head (see Fig. 10c). Your folded stroller will now look like this .
Note: For optimal storage size, release the Velcro on the back of the seat unit (with the bar underneath) to fold the seat more compactly.
Step 10
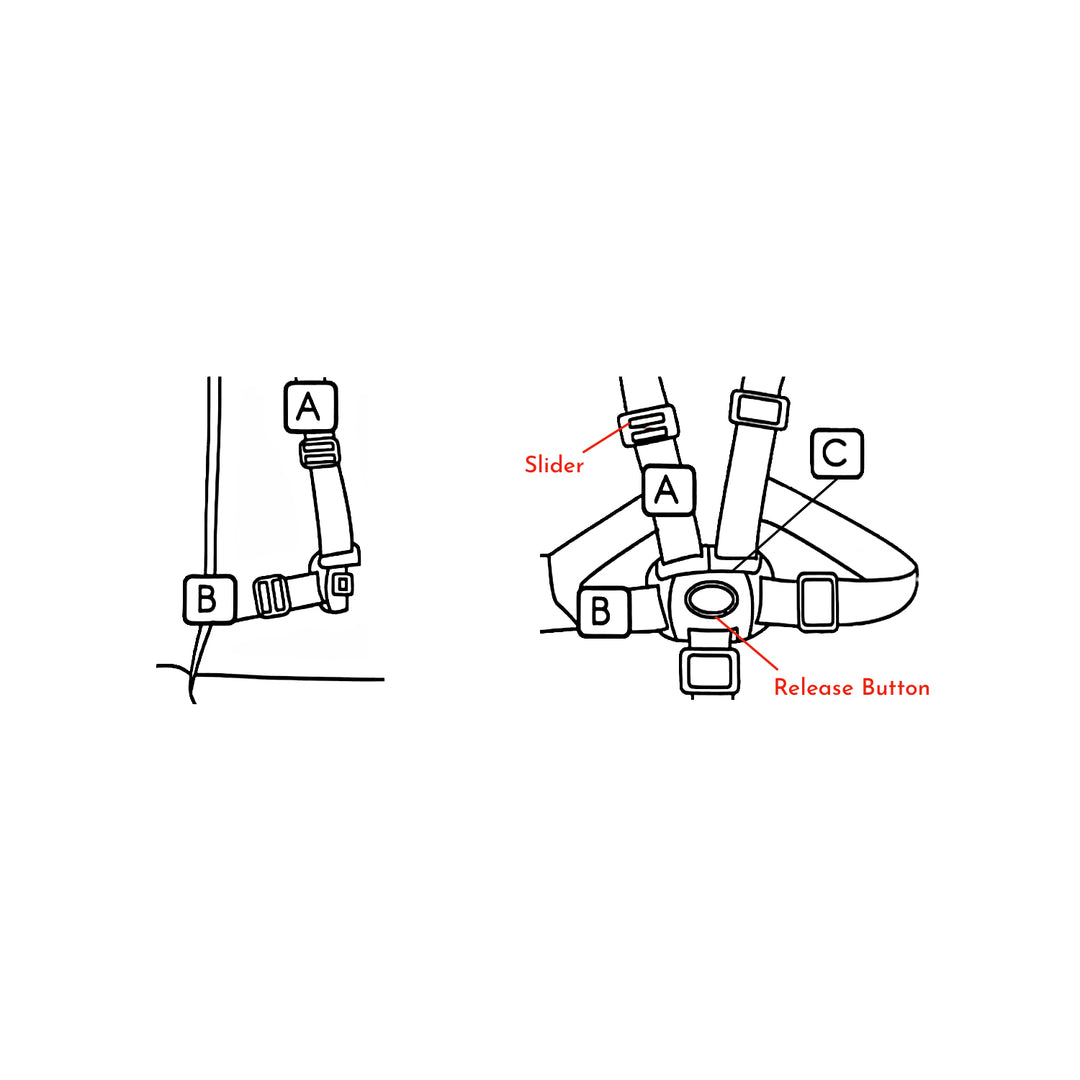
Adjusting And Secure The Harness
Slide the shoulder strap (A) onto the waist strap (B) and then push the forked clip into the central buckle housing (C). Adjust the harness by using the sliders on each strap to make it looser or tighter as needed.To release the buckles, just press the button in the center of the buckle housing.
WARNING: Always use the crotch strap together with the waist belt.
Still Need Assistance?
Our knowledgeable and friendly representatives are here to assist you with any questions or concerns you may have. We understand that some problems may require a more personalized approach, and we are committed to ensuring your satisfaction.