
CHECKLIST OF PLAYPEN
Thoroughly review the legend on the left. We will use the legend in further steps of this instruction.
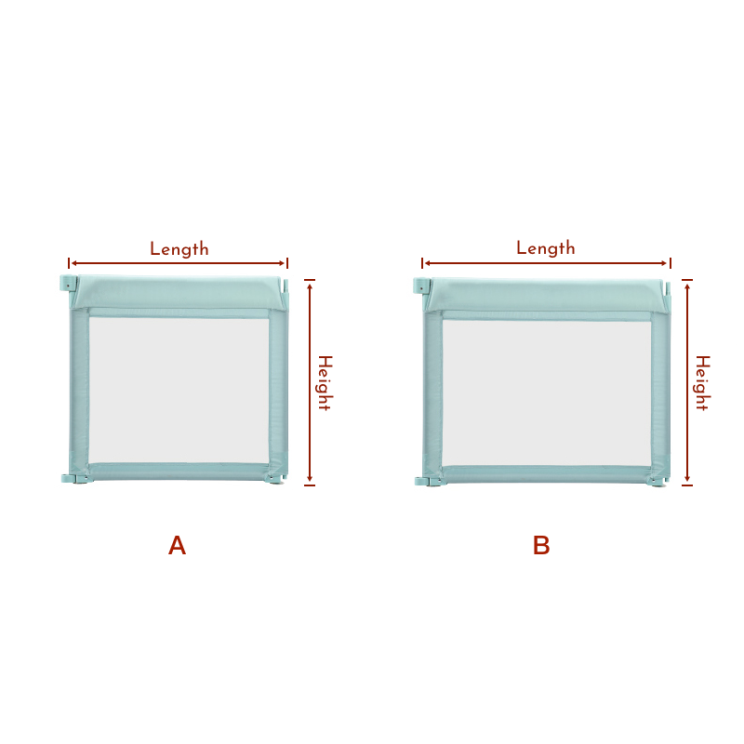
| Size | A (L x H) | Quantity | B (L x H) | Quantity |
|---|---|---|---|---|
| 50x60" | 30x26" / 82.5x68cm | 4 | 50x26" / 120x68cm | 2 |
| 60x70" | 30x26" / 77.5x68cm | 4 | 35x26" / 90x68cm | 4 |
| 60x80" | 30x26" / 77.5x68cm | 4 | 40x26" / 100x68cm | 4 |
| 70x70" | 35x26" / 90x68cm | 4 | 35x26" / 90x68cm | 4 |
| 70x80" | 35x26" / 92.5x68cm | 4 | 40x26" / 100x68cm | 4 |
How to Assemble
Follow these simple steps, it will take less than 5 minutes.
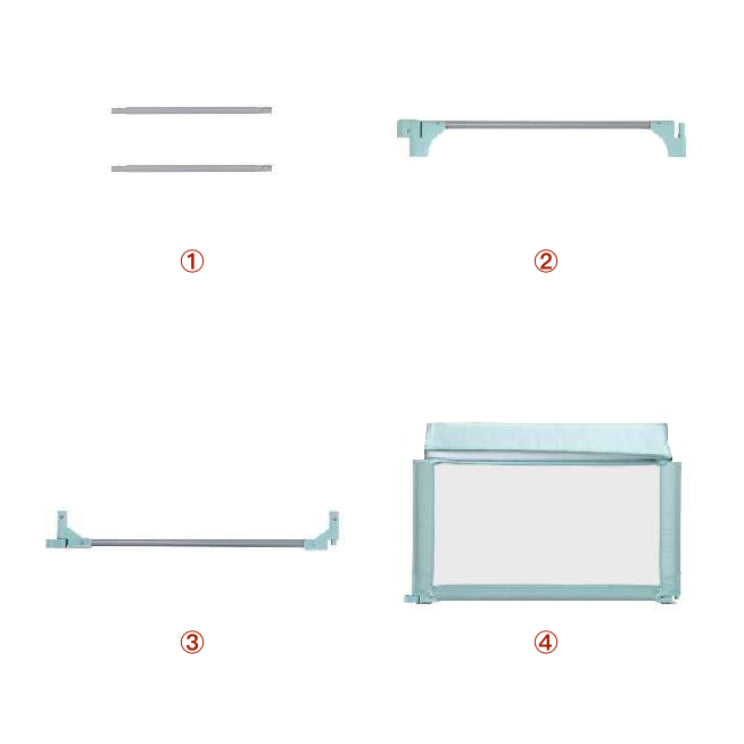
Collect all the Parts
| Name | Side tubes | Top tubes | Bottom tubes | Cloth cover |
|---|---|---|---|---|
| Quantity | 2 | 1 | 1 | 1 |
| Illustration | ① | ② | ③ | ④ |
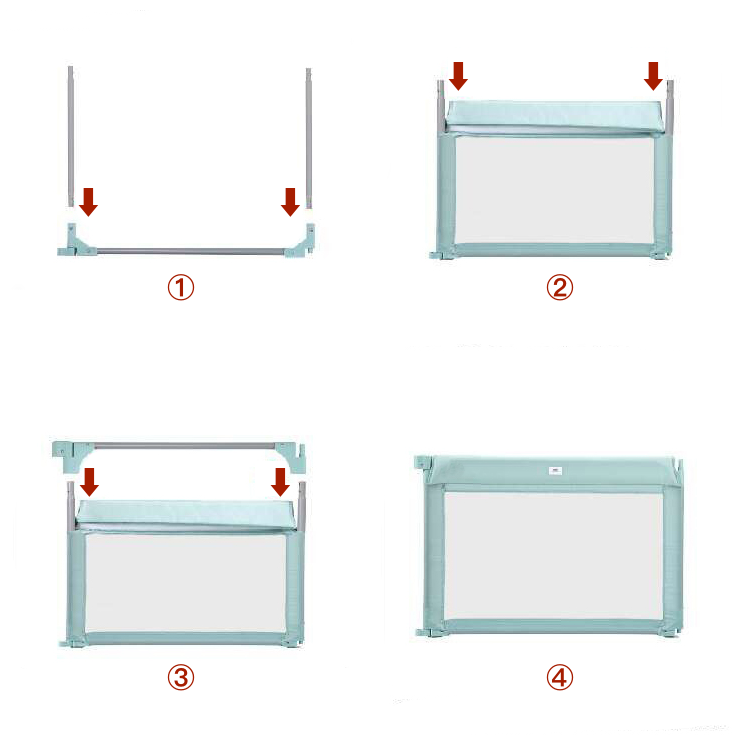
Step 1
Panel Assembly
1. Connect the two side tubes to the bottom tube.
2. Slide the fabric cover over each side tube.
3. Snap the top tube into the side tubes.
4. Zip the cloth cover around the frame so everything is secure.
👉 Make sure the label on the cloth cover faces outward and up.
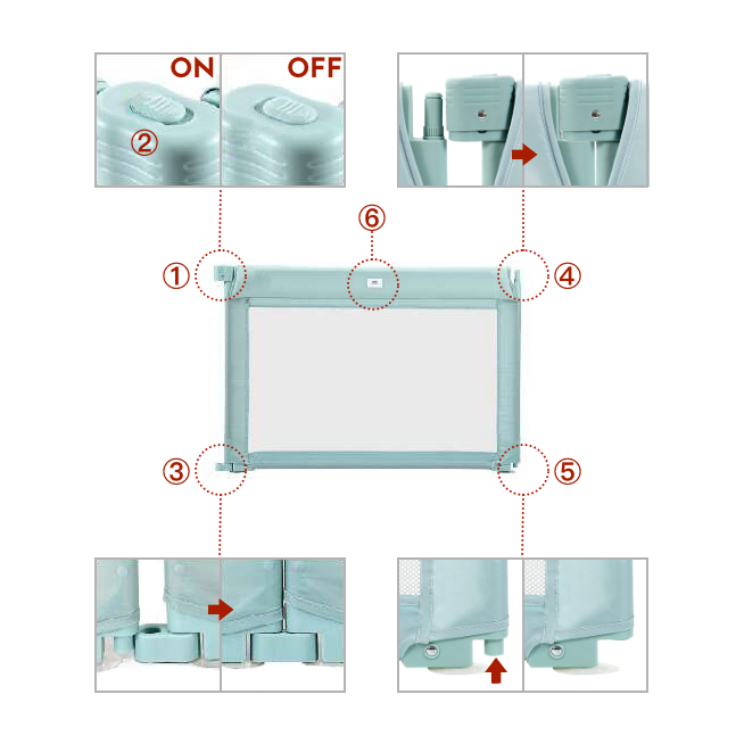
Step 2
Panel Detail Explanation
Here’s what each part does:
• Lock switch – locks the frame in place
• Switch tab – flips the lock ON/OFF
• Bottom clasp – keeps the bottom steady
• Gear pin – holds the frame securely
• Telescoping pin – keeps adjustable parts tight
⚠️ Important: The lock switch and bottom clasp must be on the same side. Otherwise, the panels won’t connect.
Step 3
Playpen Assembly
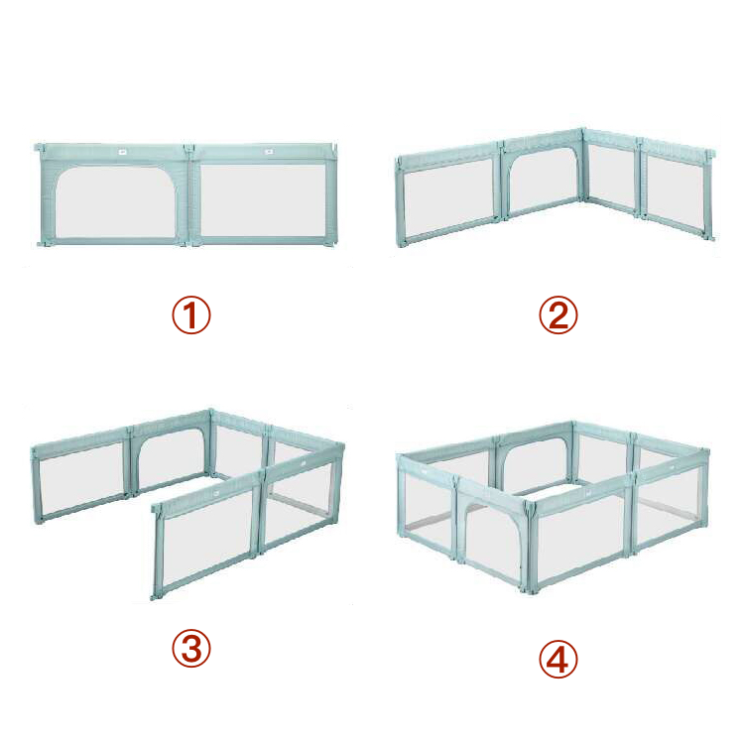
1. Snap Panel A to Panel A and Panel B to Panel B.
2. Connect the A side to the B side.
3. Add the third panel.
4. Attach the last panel to complete the playpen.
You can set it up as a square, rectangle, or L-shape depending on your space.
How to Fold
Our playpen can be folded in 2 ways.
Method 1
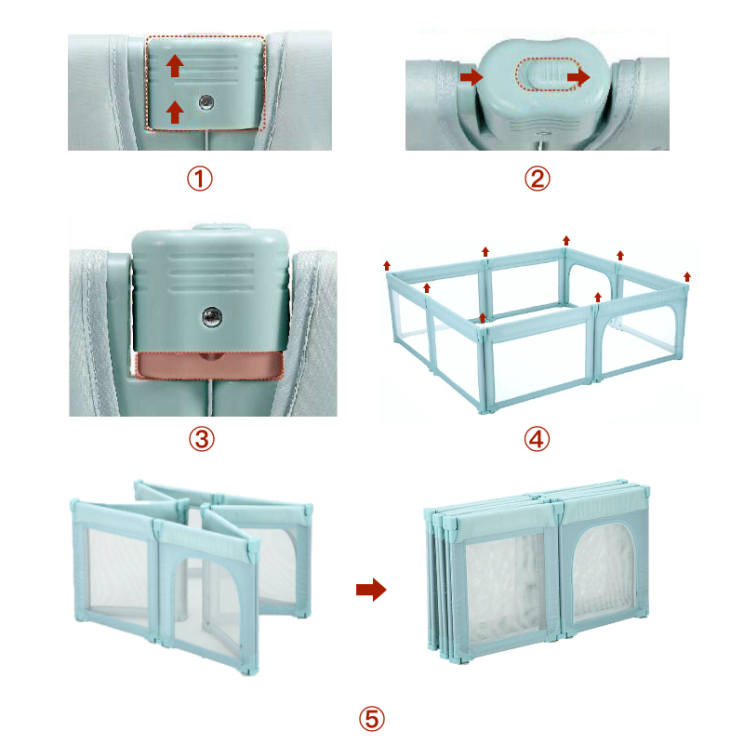
Z-Fold
1. Lift the locking catch and hold it.
2. Flip the latch switch to the other side.
3. The panel is now unlocked and movable.
4. Unlock all catches so the sides are flexible.
5. Fold by bringing the sides together in a “Z” shape.
⚠️ Always unlock the top latch first, or it won’t fold.
Step 5
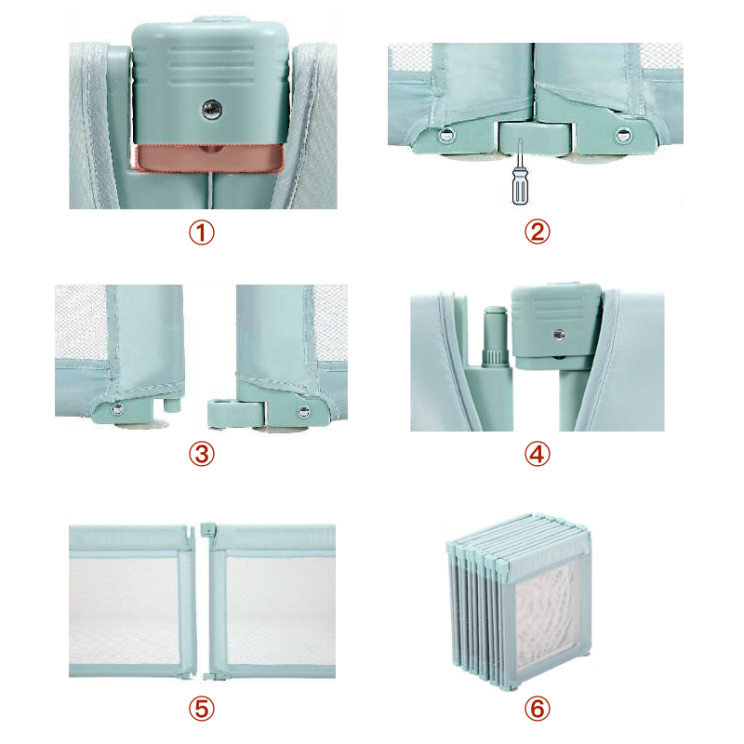
Stack Fold
1. Unlock all latches (like in Z-Fold).
2. Use a screwdriver or pen to push the latch upward.
3. Gently lift to separate the latch.
4. Slide the top latch down to remove it.
5. Only one set of connectors needs to be removed.
6. Fold panels into a flat stack for storage.
⚠️ Same rule: Always unlock the top latch first.